I used the following blogs to tweek my own pattern:
Reversible Cover made by Sweetnsassygirls.com
A little
Bit Larger: infarrantlycreative.blogspot.com
And this one to get a picture for the
opening in the front: www.joyshope.com
What you will need...
2 different fabrics,
1.25 yards of one
1 yard of the other
thread
Ribbon and or embellishments (I used some Ric Rac)
Steps for creating:
1. Cutting Fabric: Cut salvaged edges off both pieces. Then cut fabric to be 34"x42"
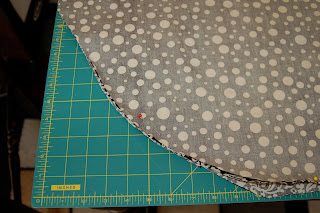
2. Round Corners: Using a large bowl or oval platter, round corners. On my front corners, I went back 6" so that it won't drag. On the back corners, I went in 3"
3. Make sure fabric is right side in, pin fabrics together to make sure they line up, trim off any excess.
4. To cut the center opening: Line up on cutting mat, or measure off to find center. I cut 16.5 inches up from the bottom (of the side with the front corners). I think I would make it a little longer next time. Maybe 18".
** If you are going to embelish down the center or add ribbon to tie the front together, now is the time to pin it all into place. I actually sewed in the Ric Rac first then pressed this section to make sure it lined up correctly. For me, the Ric Rac was by far the hardest part of putting this together, I struggled thinking inside out, rounding the corner at the top and then invisioning what it would look like flipped. I am sure that if you sew more often than I do, you would have no problem. I struggled on this part, but was well worth the ripped out stitches, mind puzzle, and finally figuring it out. I love how the center opening turned out.
5. Once you have the cener all figured out. Lay fabrics flat (right sides in), double check that fabrics lie flat once pined together. Sew almost all of the way around leaving an opening of about 6" so you can turn the fabric right side out.
6. Once turned right-side out, press flat. Be sure to turn under the fabric at the 6" opening so you can sew that section closed.
7. Top stitch around the whole cover. Be sure to enclose the 6" opening you left for turning right-side out.
8. Cut the straps. I cut 4 straps that were 9" long x5" wide.
9. Sewing Straps: Fold straps in half (width wise, with right sides in). Once folded straps will be 9"x2.5". Press. Sew on one short side then long side. Turn right side out. Fold freyed edges under by about 1/4", press. Top stitch straps (at least the side with the opening).
10. Finishing off the straps: I cut ribbon to tie over the handle of the car seat (you could just do the ribbon and forget the strap cutting). I cut my ribbon 26" long. Then I sewed on the straps, I did not sew all of the way to the edges, just a rectangle in the center of the ribbon to attache it well to the strap. Alternatives for ribbon would be a ribbon fold and then a button on top. Sewing on a fabric flower. Really however you want to finish it off.
11. Pining Straps on Canopy: This was a tricky part. I sewed mine on 10" in from the outside edges, about 20" up from the bottom of the front. Pin it on secured with multiple pins, then strap on carseat to make sure it fits where you want it to. I adjusted mine 2 times after testing it out on the actual carseat. If you are making your canopy reversible, once you have the top straps pined in place, pin the 2nd set of straps on the back side of the canopy in the exact place you have the top straps.
12. Sewing Straps on: Measure out where the center of the strap is (about at 4.25"), mark it with a pin. Then create a box 1" wider than the center point (1/2" lengthwise on the top and bottom side of the pin) but just as wide as the strap. Box will be about 1"x 2.5". I also put an X through the box for extra reinforcement.
13. Strap on your car seat and admire all of your hard work... and count down the days until you can put your little bundle of joy inside your adorable canopy you created.
Hopefully this all makes sense! Let me know if part of this is confusing.


